The Idea
Tip: Always keep a small notepad or sketchbook handy. A idea can pop into my head when I least expect it and when it does, I have to scribble it down immediately. If I don’t, the idea may whither and vanish forever, and that makes the sweet muse of cartooning cry.
I got the idea for this Brudders comic during a production meeting at work and this is what I doodled on the back of my meeting notes.
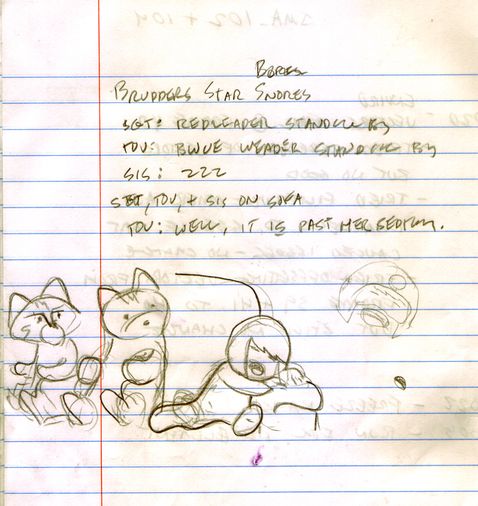
Sometimes the simplest idea can become a major research project. I’ve seen Star Wars a billion times but I wanted the strip to look like I’ve seen the movie a billion and one times. Luckily, I got assigned to work on cinematics for Star Wars Kinect and had to do the research anyway.
How convenient!
Throw It On The Pile
After I jot down my idea, I add it to my long list of ‘brainstorms.’ I keep several idea lists like this one in Google Docs, Evernote or a Libre Office file. Later, if I find myself tapped out for ideas, I turn to these handy idea lists.
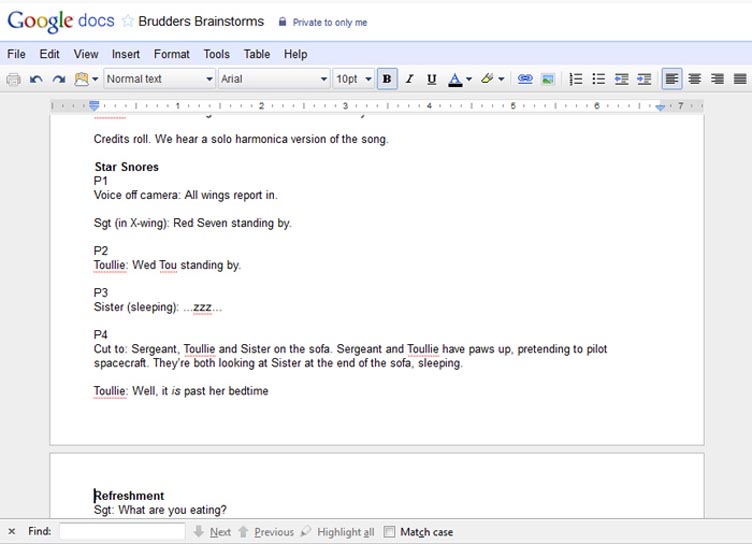
It’s fun to browse through these lists and see which idea grabs me. It could be one I don’t remember thinking about, or one I felt was just ‘so-so’ when I wrote it down but on re-discovery inspires a whole new interpretation.
The Script
Yeah, yeah, I know. It may seem like overkill to write a three or four panel web comic using a professional screenplay writing program like Final Draft but this process really helps me plan and organize exactly what I will be drawing in each panel. Believe it or not, drawing a comic strip is not that different from shooting and editing a movie.
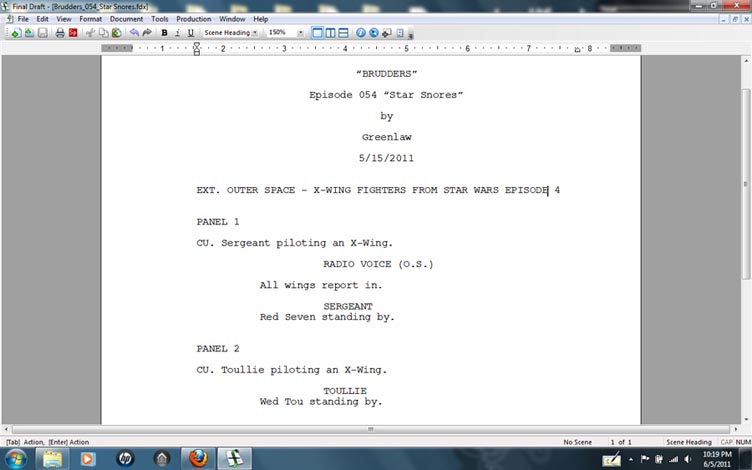
Also, writing these ‘mini-plays’ is great practice for writing bigger and more ambitious projects. (I’ve got lists for those too.) At this stage, the dialog, pacing, or even the entire structure of the comic may change drastically from the original idea. (In this case, it did not.) Once I start drawing the strip, I pretty much stick to the script
Of course you don’t need to use Final Draft to write a script. Any word processor, like Libre Office for example, can do the job just fine.
Layout
Because this episode is a parody of a classic movie, I wanted to be as true to the original scene as possible. What better way than to use the actual movie for reference?
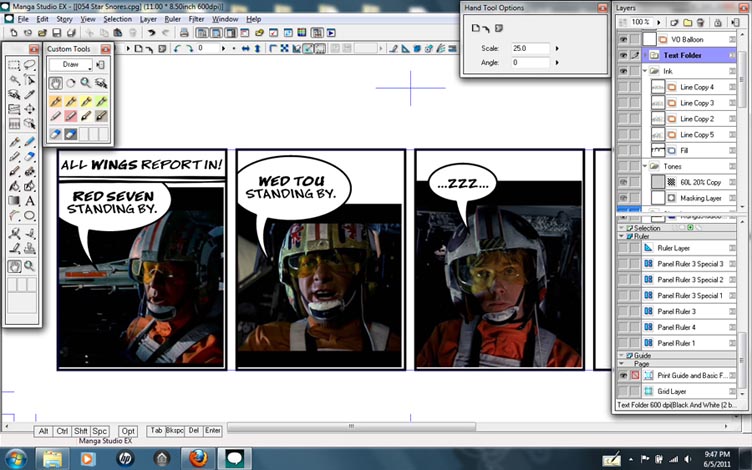
These images were grabbed from a DVD and brought into Manga Studio 4 EX, a program is specifically designed for creating comics.
Thumbnails
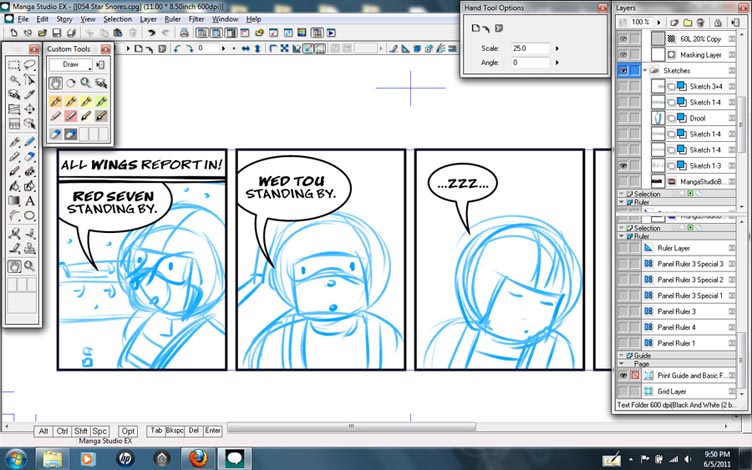
Now the fun starts. I usually thumbnail the strip in just a couple of minutes. At this stage, I try not to think too much about what I’m doing. This is more about getting an impression down that can be used as a foundation for a finished drawing.
Refinements
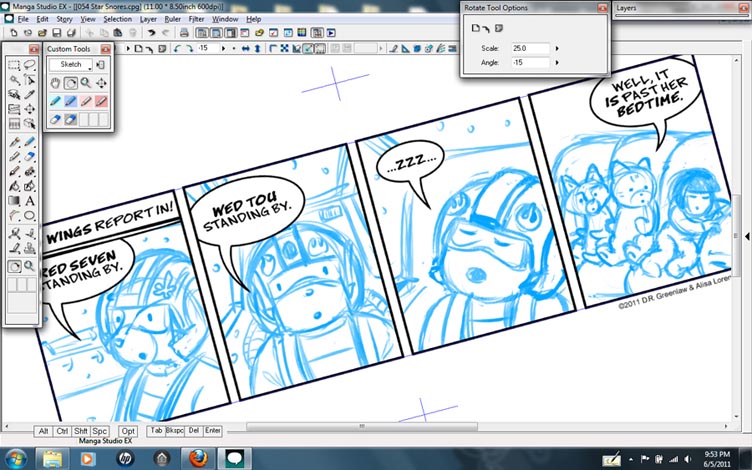
After getting the thumbnails sketched, I work on tightening up the lines and shapes. Sometimes I’ll change a character’s pose or flip a panel to help the sequence flow better. The dialog might get some adjustments too. I try to keep the drawing style for Brudders simple but it’s not always easy deciding what details to leave in and take out. Sometimes making something lookk ‘simple’ is very hard to do.
Inking, Part 1
In Manga Studio, I usually ‘freehand’ my ink lines using the vector brush tool. The vector brush simulates inking with a brush or quill pen but the strokes remain ‘live’ and fully editable after I’ve drawn them. What this means is that I can tweak or completely change a brush stroke by adusting its shape and thickness using special editing brushes and a magnet tool.
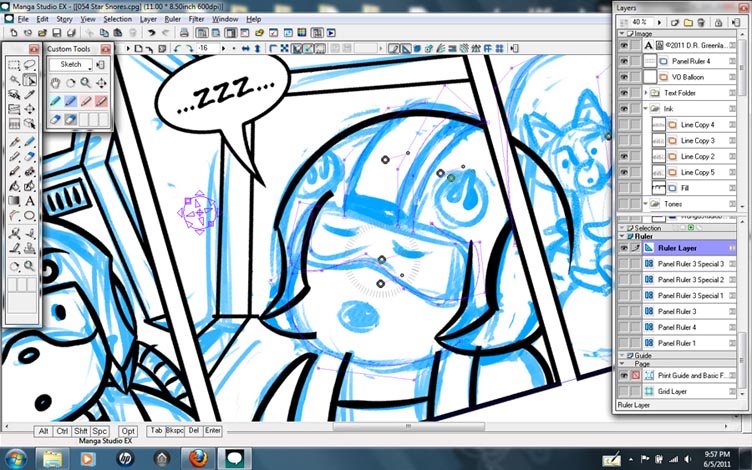
If I need to draw something with precision (like the X-wing pilot helmet in this strip,) the program has tools called Ruler Guides, which are editable wire paths that I can shape and position to construct almost anything with a good deal of accuracy. Once I get my curves in place, I can use a brush tool to ‘snap to’ and follow the guides exactly as laid out, and still maintain manual control over the thinness and thickness of the lines using a pressure sensitive pen. In other words, these Ruler Guides can be used the same way a traditional artist will use french curves, templates, and bendable curves.
Inking, part 2
This is another look at vector brushes. Here, I activated Show Centerline which helps me see where to ‘grab’ the knots in a brush stroke to adjust its shape.

Filling
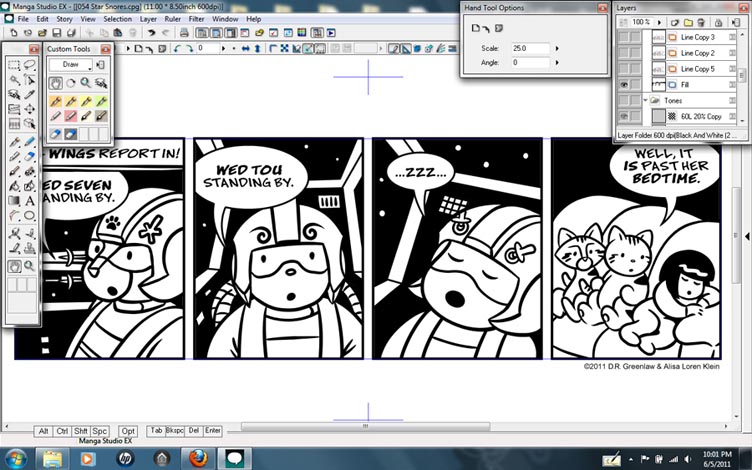
Filling is probably the easiest step in the process. A separate ‘Fill’ layer is created below the ‘Ink’ layer and a Paint Bucket tool is used to spill ink into the the solid areas. The tool can be set to use any ‘ink line’ layers as containers while ignoring the sketch and text layers layers. You can even set the Paint Bucket tool to fill to the centerline of the vector paths, which simplifies color registration. Unlike Vector layers, the Paint Bucket tool only works in a bitmap (pixel-based) layer but resolution independence isn’t important with fill layers because any aliasing that occurs will be overlapped and hidden by the vector-based brush strokes.
Tones
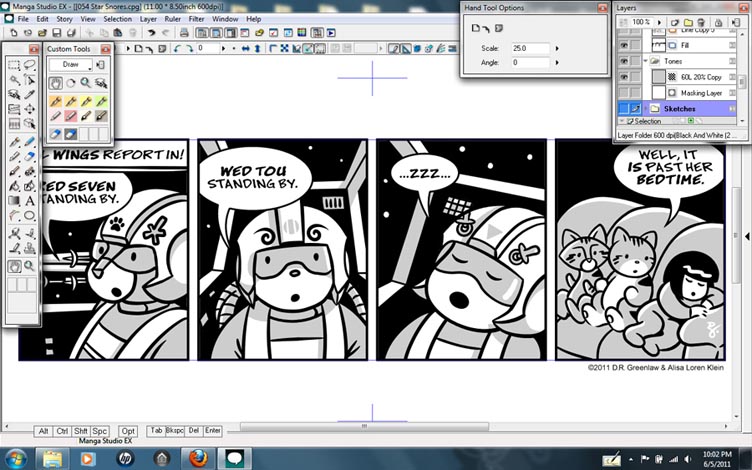
A Tone layer is a special layer in Manga Studio that simulates those plastic shading and transfer sheets used by traditional graphic artists. But in Manga Studio, Tones can be dynamically changed at anytime for different haltone patterns, colors, gradient values, or completely different textures. Even better still, I can brush on Tones or erase them where I don’t want them. Yay! No more mutilating my fingers with an x-acto knife! Using multiple Tone layers, Tones can be applied additively just like the real thing. Or, if that’s not what you want, you can insert Mask layers between Tone layers to give the Tone above the mask a specified ‘opaqueness’. I use tones in Brudders mainly to give these simple drawings just a little bit of depth and roundness.
Final Touches
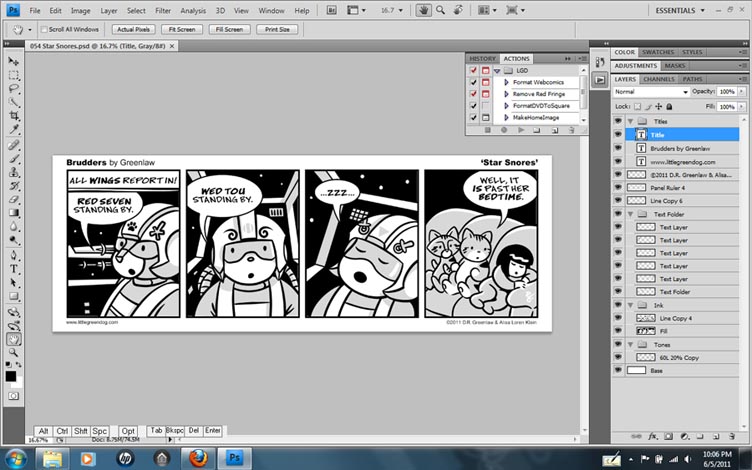
After I’m done drawing the comic strip in Manga Studio, I export the page as a Photoshop file. What’s nice about the way Manga Studio exports a file is that many of the layers are preserved for other programs, making it easy to break down the artwork for multiple applications, like buttons on a website, print media, or a T-shirt graphic. It also makes it easier to colorize or paint the artwork. For the web version of my comics, I use custom Photoshop Actions to apply the titles, and to format the strip in whole and parts for the website and blog.
To see the final comic as it was posted on the website, click here: Brudders, Episode 54 ‘Star Snores’

